How to Build Stylish Wooden Shelves That Last for Years
8/10/2025
James Oluwaleye
Learn how to build a simple, sturdy wooden shelf using basic tools and affordable materials. Perfect for beginners, renters, or anyone looking to add extra storage without breaking the bank.

How to Build Stylish Wooden Shelves That Last for Years
- 1.Choosing the Right Shelf Style
- 2.Picking the Best Wood
- 3.Measuring and Cutting Accurately
- 4.Sanding for a Smooth Finish
- 5.Mounting the Shelf Securely
- 6.Finishing Touches: Staining or Painting
- 7.Styling Your New Shelves
- 8.Final Thoughts
Wooden shelves are a great project that offers a lot of benefits for not much work. They can instantly provide storage, make a room look complete, and you can customize them to fit exactly where you want them. Plus, when you build them yourself, you get to choose the size, style, and color, instead of just picking from what a store has.
The shelves you create can show off your personal style, whether you go for modern floating shelves or rustic ones made from reclaimed wood. When you make your own shelves, you know how sturdy they are because you picked the wood, screws, and how they’ll be mounted.
Choosing the Right Shelf Style
Before you start cutting wood, think about what type of shelf you want:
- Floating shelves: These give a clean, modern look with no visible brackets.
- Bracket shelves: These are easy to install and have a more traditional appearance.
- Corner shelves: Perfect for making use of otherwise wasted space.
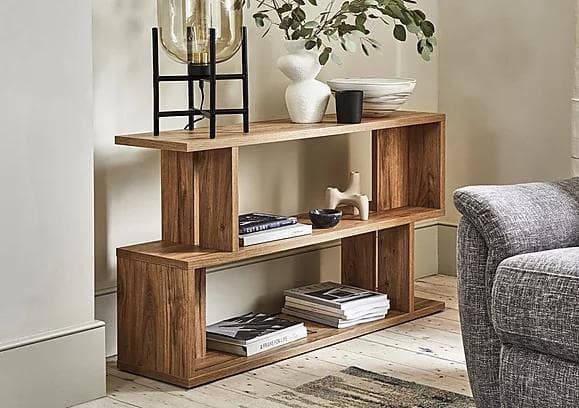
- Ladder-style shelves: These add a decorative touch to living rooms or bedrooms.
Your choice will affect how you mount the shelf and what tools you'll need. For instance, floating shelves need a hidden support frame, while bracket shelves can be screwed directly into the wall.
Picking the Best Wood
The type of wood you select will determine how strong your shelf is, how long it will last, and how it looks.
- Hardwoods like oak, maple, or walnut are strong and can hold heavy items, but they are more expensive and harder to cut.
- Softwoods like pine are easier to work with and more budget-friendly, but they can get dents more easily.
- Plywood is a good choice if you plan to paint the shelves since it's stable and cheaper than solid wood.
If you're planning to put heavy items on your shelf, aim for at least ¾-inch thickness. For a sturdier, chunkier look, you can use wood that is up to 1½ inches thick. If using reclaimed wood, make sure it’s clean, dry, and free of pests.
Measuring and Cutting Accurately
Getting the measurements right is crucial to avoid ruining your project. Use a tape measure, and remember the saying: measure twice, cut once. One helpful tip is to mark the size of the shelf on the wall with painter’s tape. This way, you can see if the dimensions fit well in the room before you make any cuts.
When cutting, use clamps to hold the wood steady and a fine-tooth saw blade to prevent splintering. If you're new to cutting wood, practice on some scrap pieces first.
Sanding for a Smooth Finish
Sanding is important for making your shelf look polished. Start with coarse grit sandpaper (around 80) to smooth out rough spots. Then switch to medium grit (120) and finish with fine grit (220) for a smooth surface.

Always sand in the direction of the wood grain. Sanding against the grain can leave scratches that will show up once you apply paint or stain.
Mounting the Shelf Securely
How you mount your shelf will depend on the type of wall you have.
- For drywall with studs: Use a stud finder and screw directly into the studs for the strongest support.
- For masonry walls: Use masonry anchors and a hammer drill.
- For floating shelves: First, attach the hidden support frame securely, then slide the shelf over it.
Before tightening the final screws, check to see if it's level. A crooked shelf is easy to notice from across the room.
Finishing Touches: Staining or Painting
The finish you choose will protect the wood and add style.
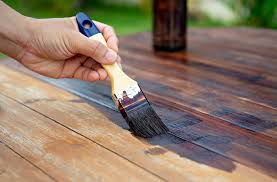
- Stain brings out the natural wood grain and gives a warm look.
- Paint allows for many color choices and is great for plywood.
- Clear sealant protects against moisture, which is especially important in kitchens and bathrooms.
If you’re painting, remember to use primer first to help the color stick and last longer.
Styling Your New Shelves
Shelves can do more than just hold items; they can also enhance your décor. Mix books, small plants, framed photos, and decorative items for a balanced look. Leave some empty space to prevent a cluttered appearance.

Keep in mind that all shelves have a weight limit. Distribute heavier items across brackets or supports to avoid damage.
Common Mistakes to Avoid
- Not securing shelves into studs or using the right anchors.
- Skipping the sanding step, which can leave the shelf rough.
- Forgetting to seal the wood, which can lead to water damage.
Final Thoughts
Building wooden shelves is a mix of practical skills and creativity. You can save money, learn new skills, and create something you’re proud of. With the right materials, accurate measurements, and attention to detail, your shelves can last for many years.